Cinemachine and Timeline are two powerful tools in Unity that can be used to create dynamic camera movements and control sequences of events. Combining them can lead to even more compelling gameplay experiences. In this article, we will explore how to use Cinemachine and Timeline together in Unity. Cinemachine is a virtual camera system that allows you to create dynamic camera movements in your game. It is designed to be flexible and easy to use, and it provides a variety of features to help you create cinematic camera shots. Timeline, on the other hand, is a tool for creating and controlling sequences of events in your game. It can be used to control everything from animations to particle effects.
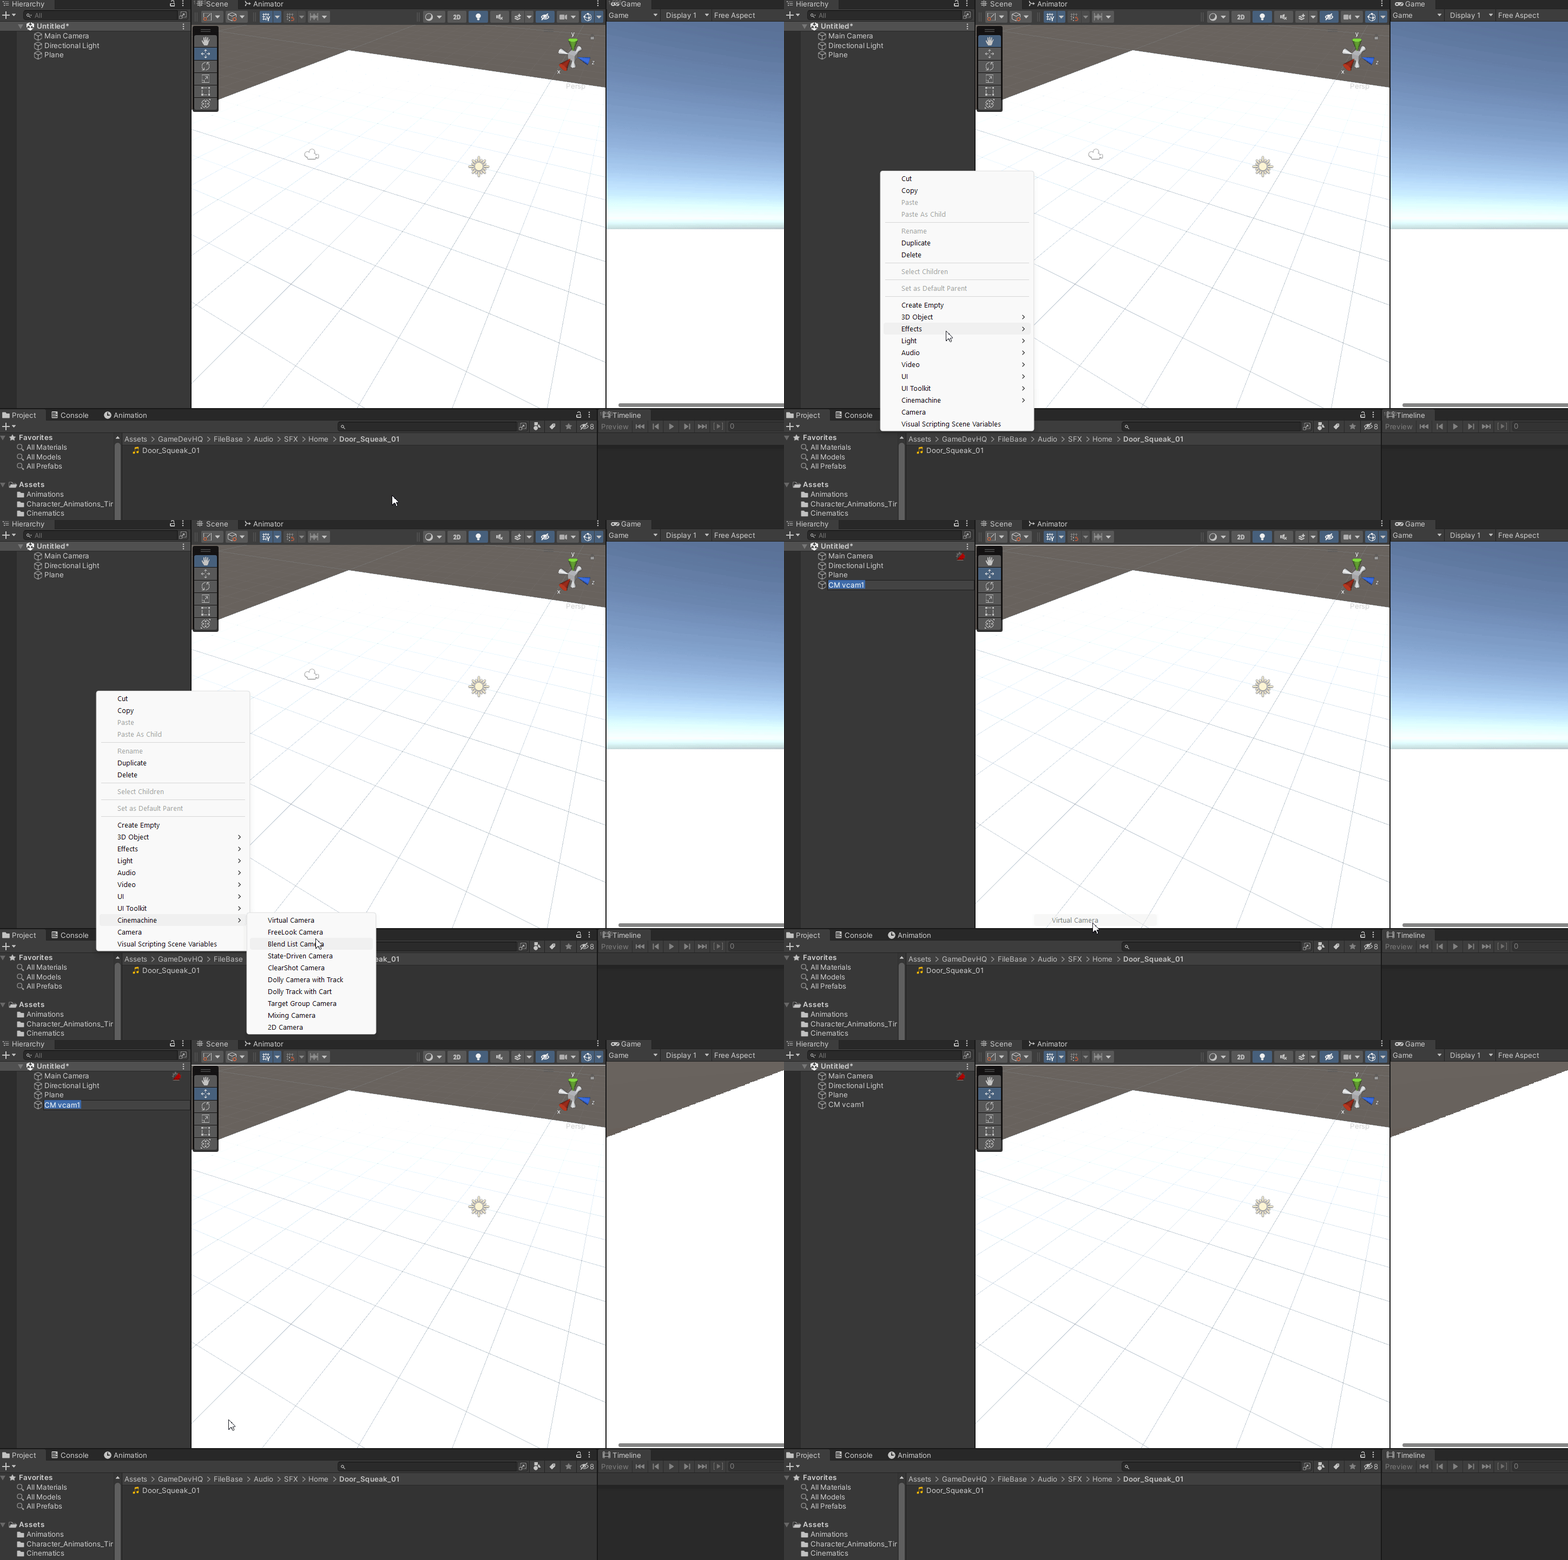
To use Cinemachine and Timeline together, we need to start by creating a Cinemachine virtual camera. This camera will be the one that we use to capture the shots that we want to create. To create a Cinemachine virtual camera, go to GameObject > Cinemachine > Virtual Camera in the Unity Editor. This will create a new game object in the scene with a Cinemachine virtual camera component attached.
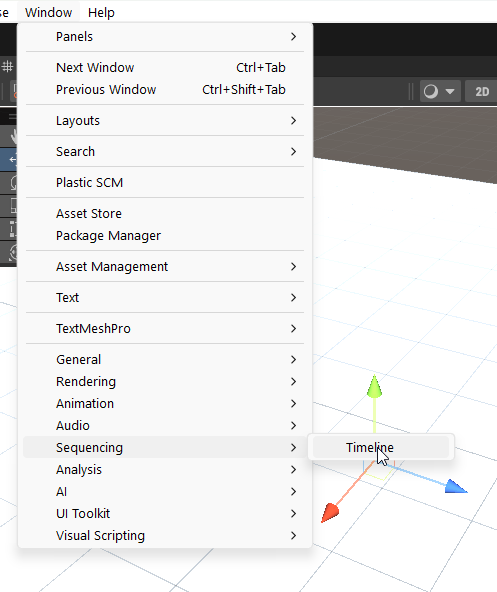
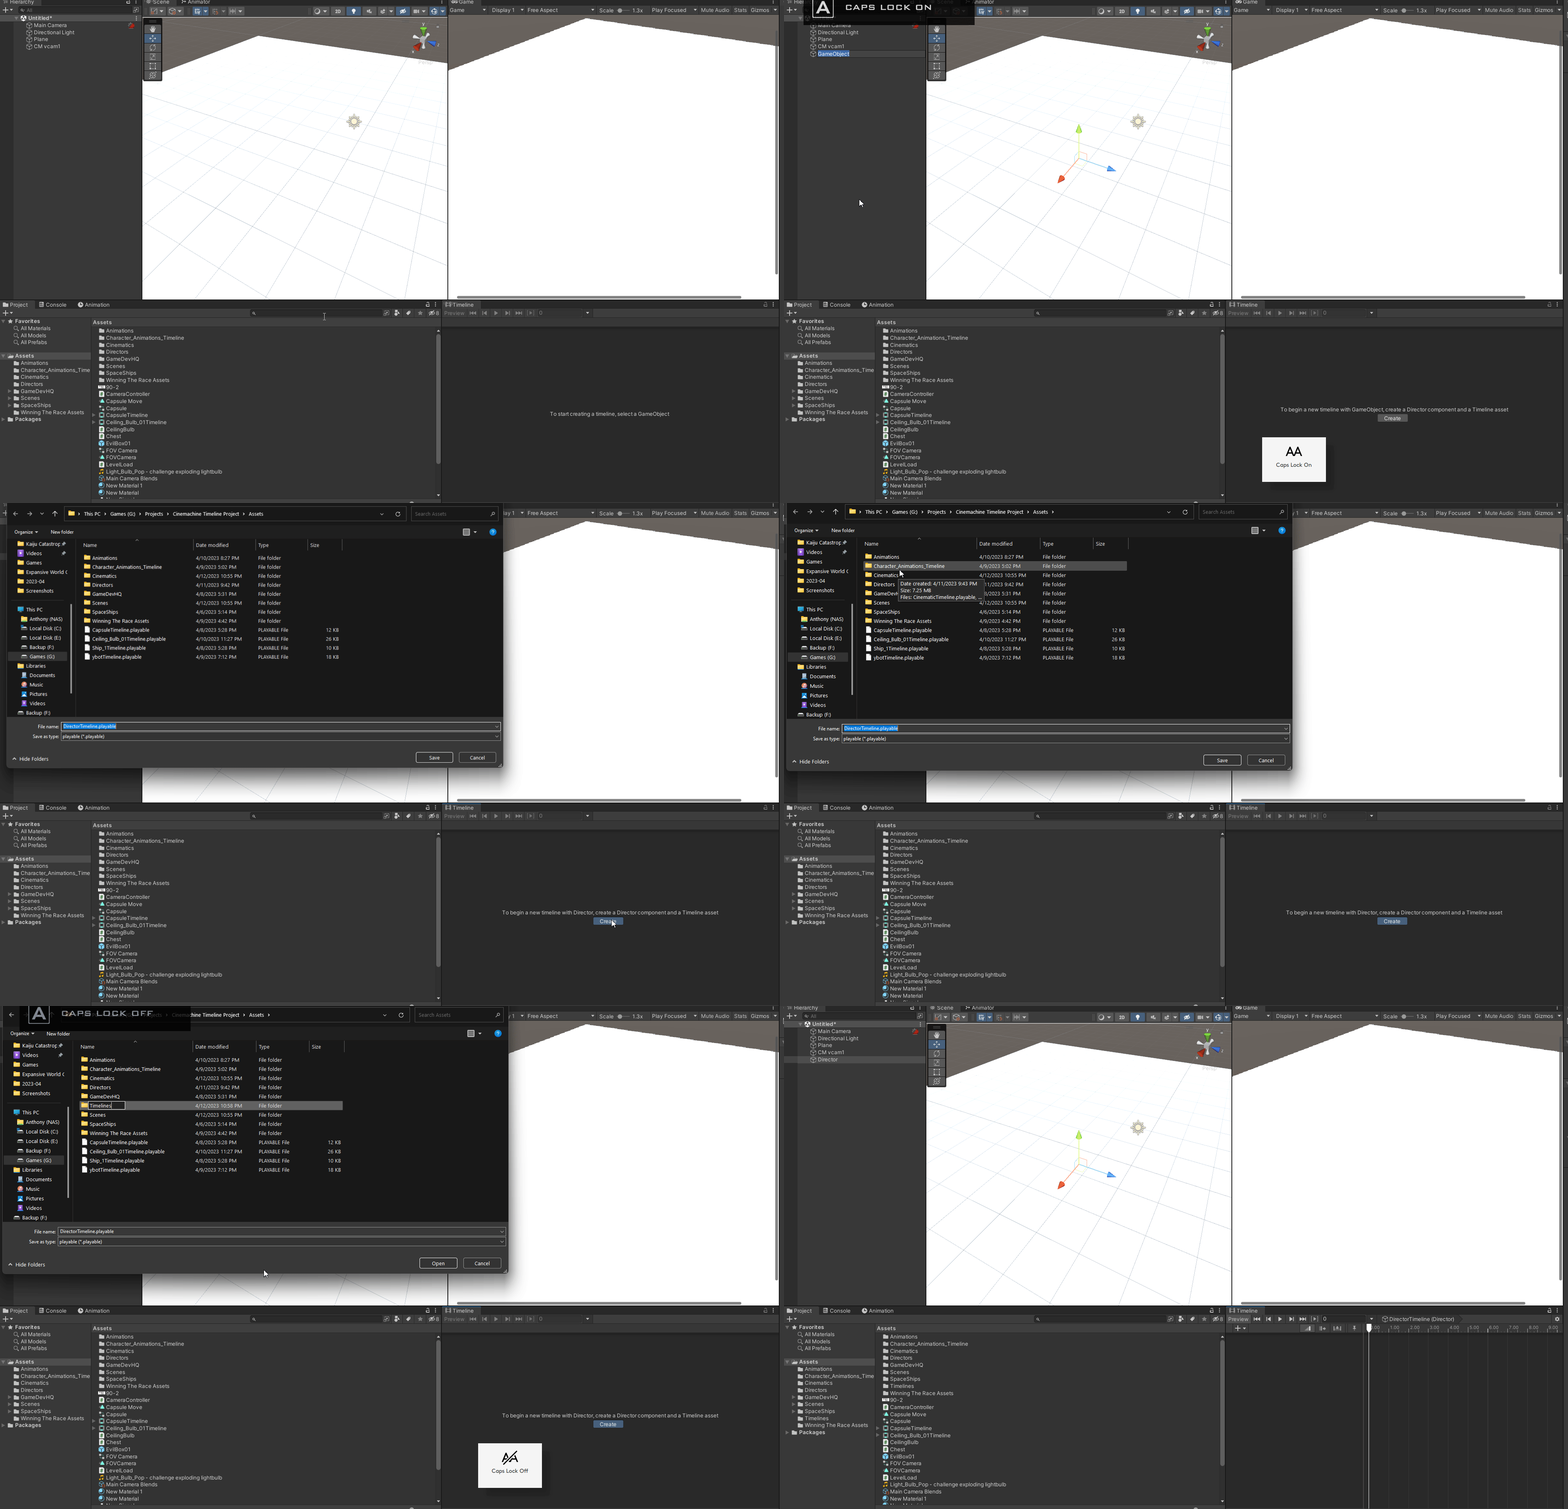
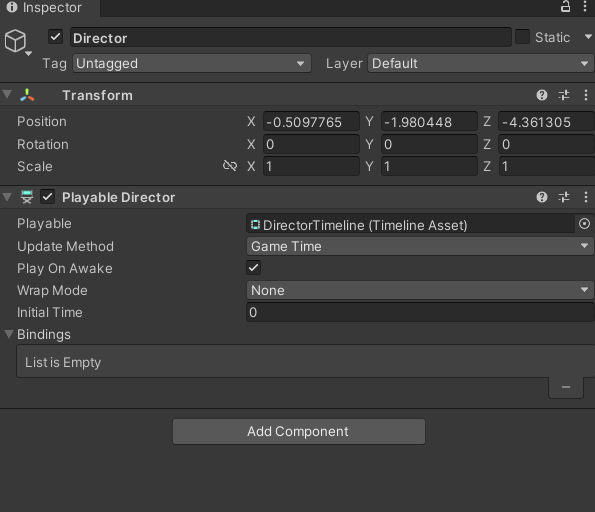
Next we need to create a Timeline Playable Director. This will control the Timeline. Create a new Game Object named Director and then create a new Playable Director in the Timeline Window (WIndow > Sequencing > Timeline) and save it in a folder named Timeline or whatever you’d like. This will create a Playable Director asset and allow you to add tracks to the Timeline window.
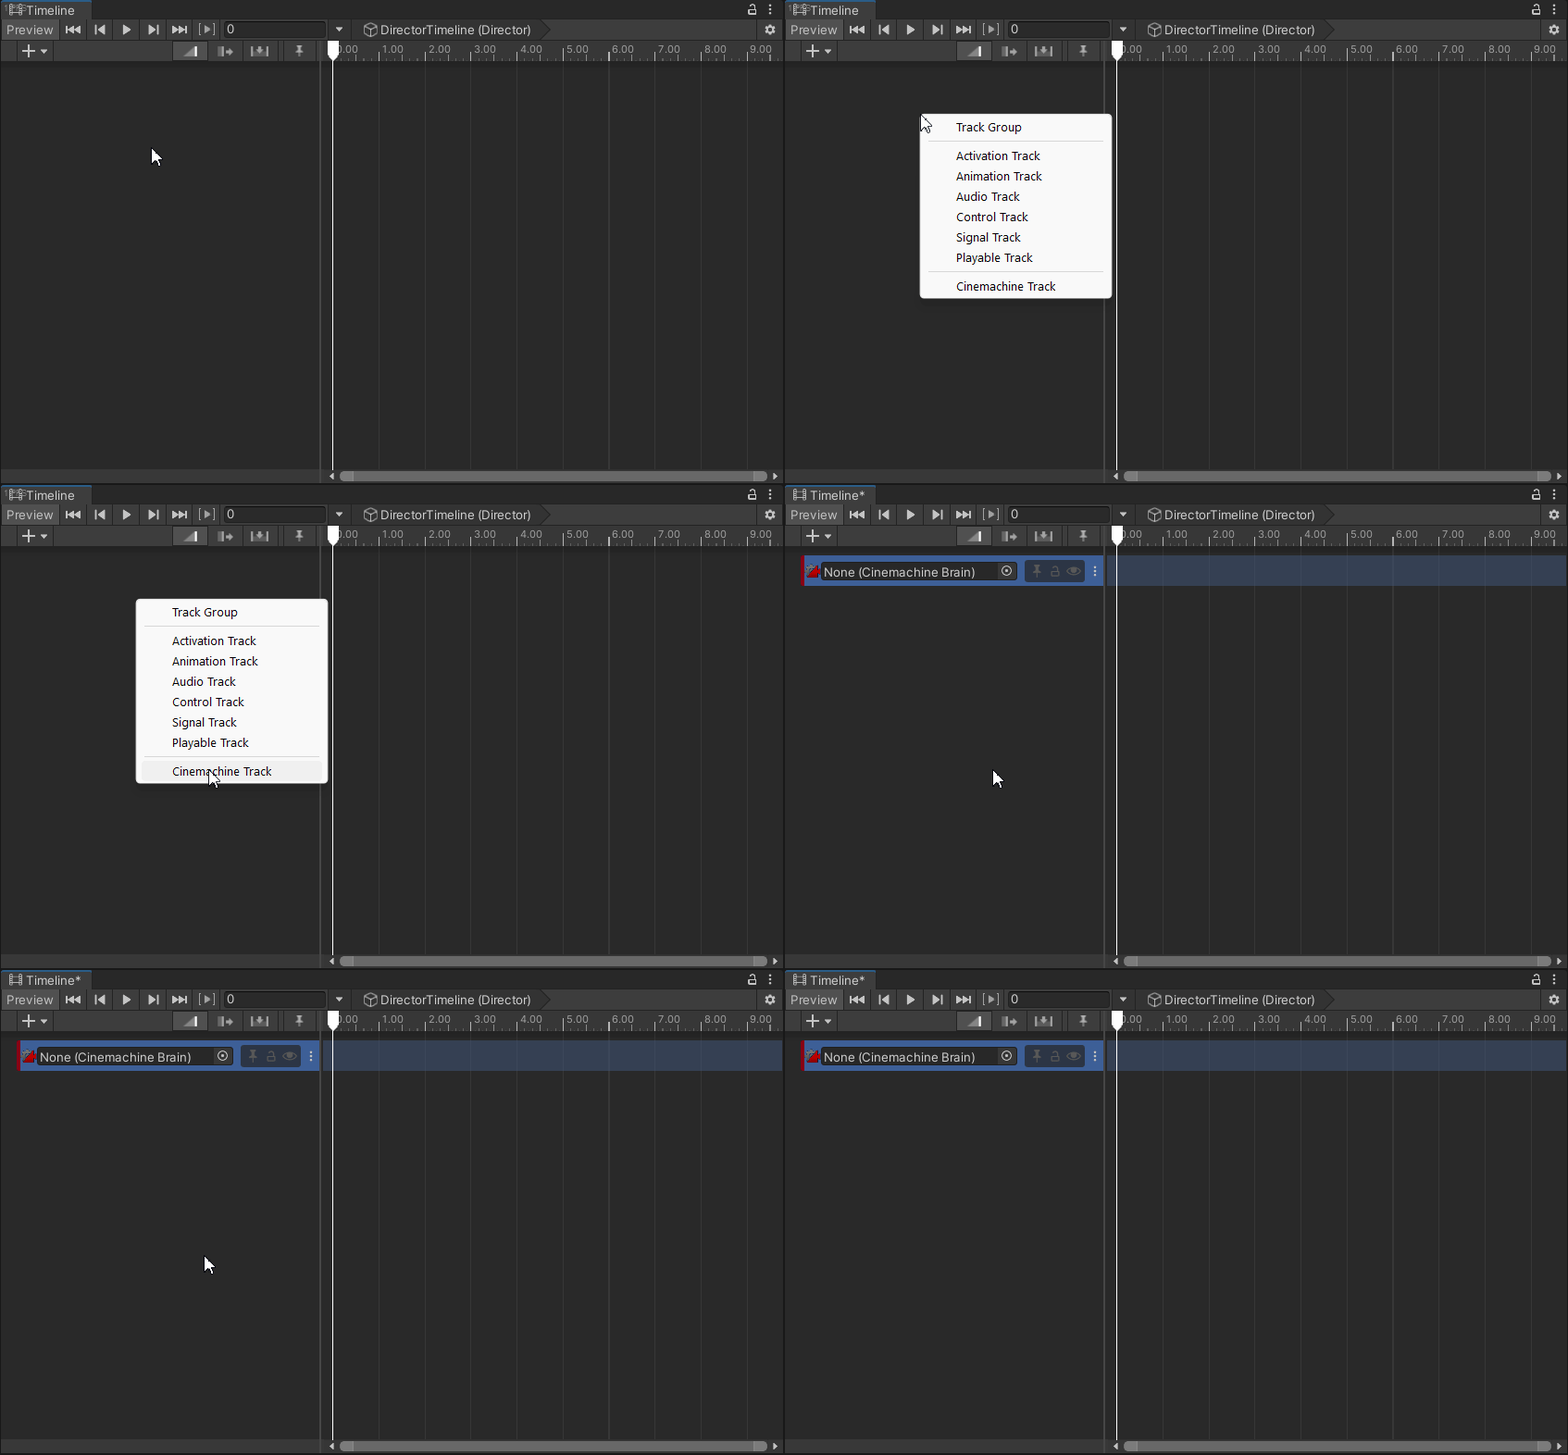
Next, we need to add a Cinemachine track to our Timeline. This track will allow us to control the virtual camera that we just created. To add a Cinemachine track, right-click in the Timeline window and select Cinemachine Track from the context menu. This will create a new track in the Timeline that we can use to control the Cinemachine virtual camera. Then drag the Cinemachine Brain into the slot (this should be attached to Main Camera) so that you can control your virtual cameras that you add to the track.
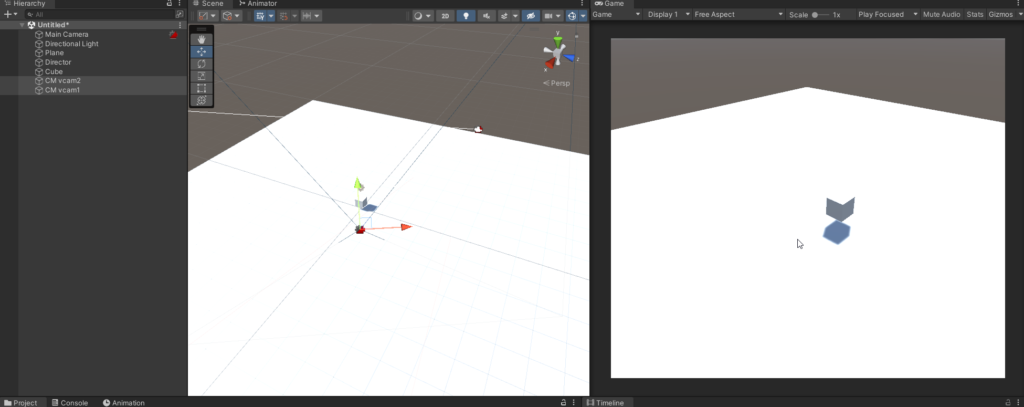
Let’s add another virtual camera and cube. Then we’ll align our virtual cameras with different angles to get different views of the Cube. Use GameObject > Align With View when you have the vCam selected to change it’s view to match the one in the scene view. You can use the Solo button the Cinemachine vCam component to make sure it’s matching up how you want. Yoour scene should look like above.
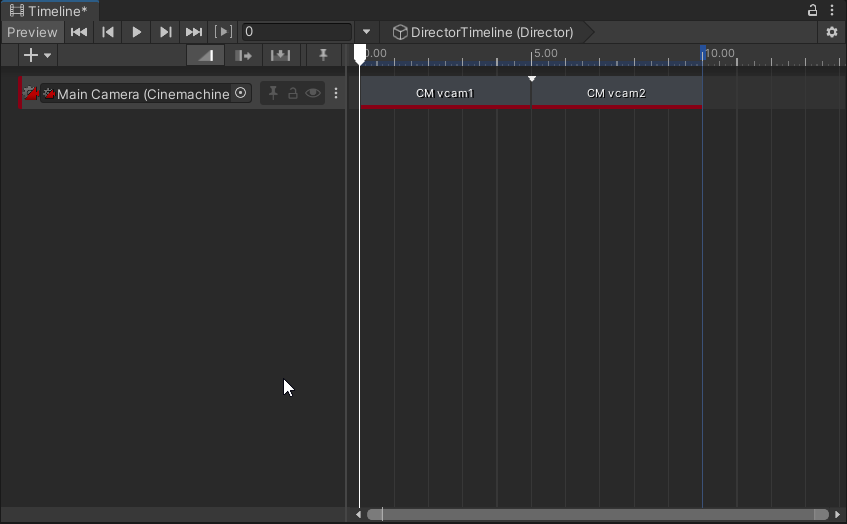
Next we’ll add our Cinemachine vCams to the Timeline by dragging them from the inspector to the Timeline. Make sure you have the Director GameObject selected to see the Timeline in the Timeline window. It should look like above when you’ve done it correctly. You can adjust the length of each view before it switches to the other view.
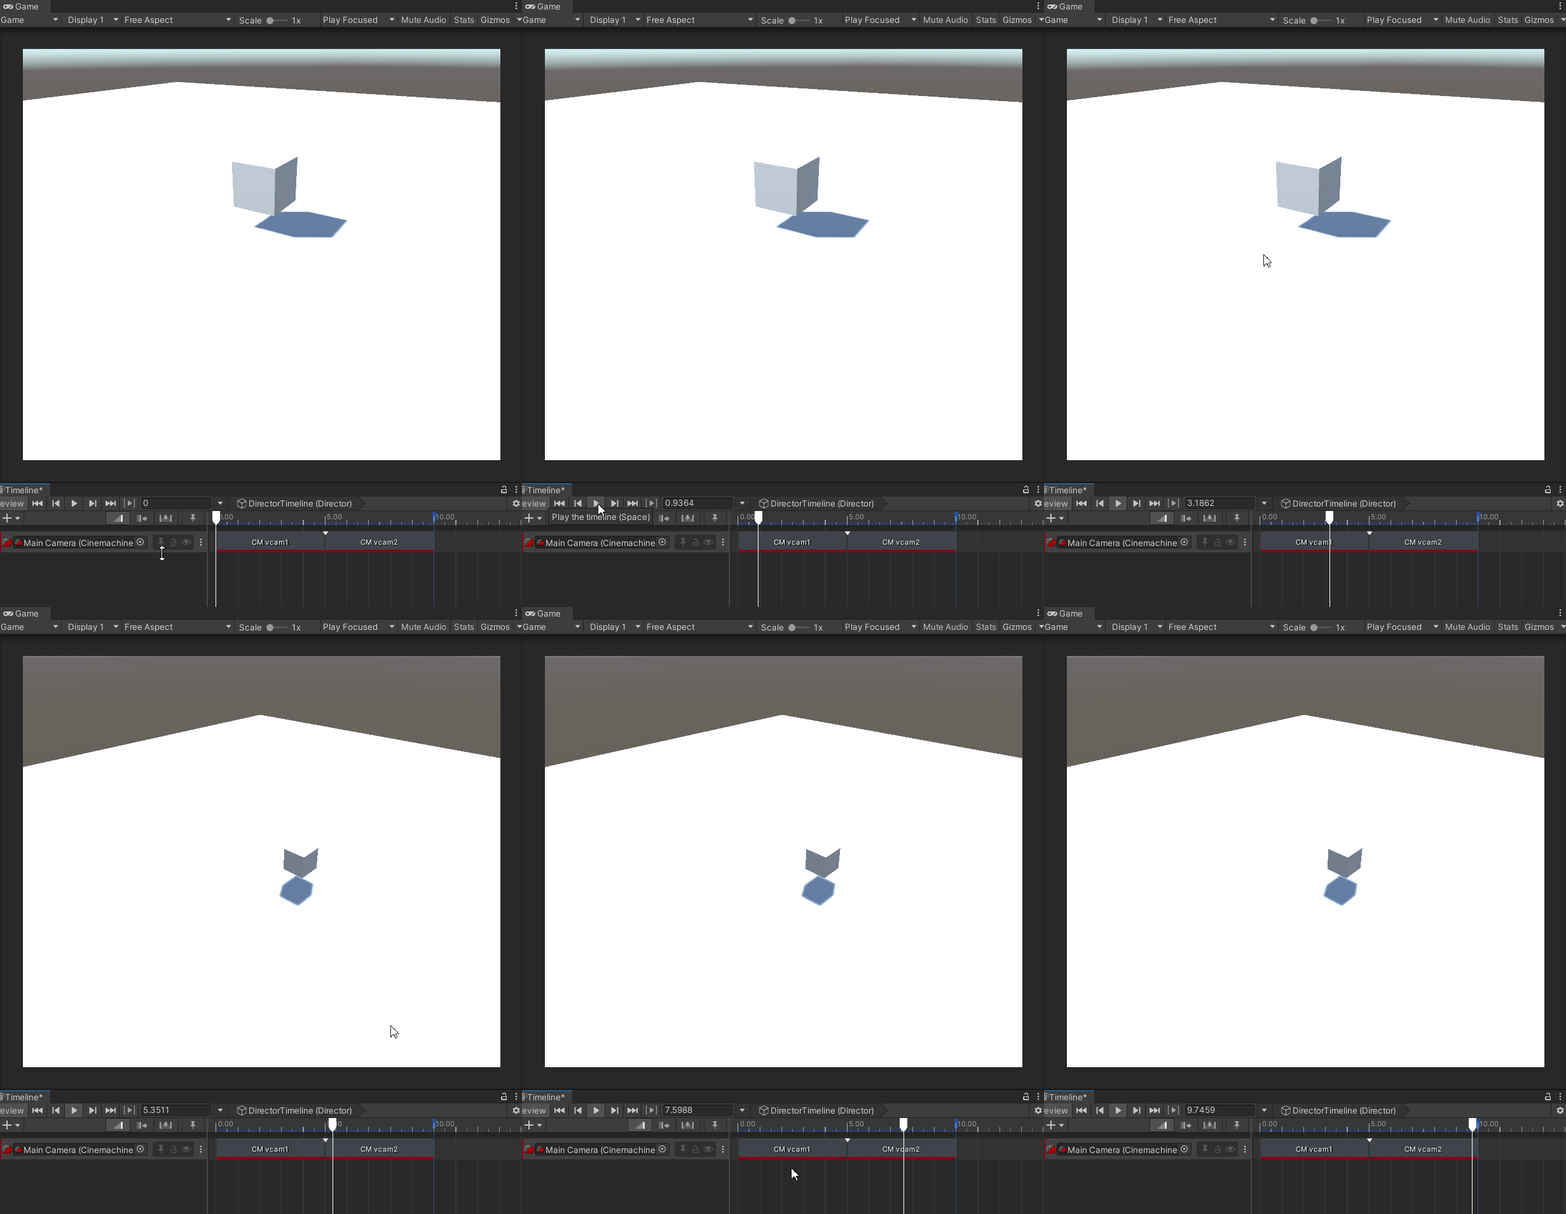
Once we have our camera shots set up in the Timeline, we can play back the sequence to see how it looks. We can also add other tracks to the Timeline to control other elements of the game, such as animations, particle effects, or sound effects.
In conclusion, combining Cinemachine and Timeline in Unity can lead to some truly compelling gameplay experiences. By using Cinemachine to create dynamic camera shots and Timeline to control sequences of events, we can create immersive and engaging games that keep players coming back for more. With a little bit of practice and experimentation, you can create your own cinematic masterpieces using these two powerful tools.
