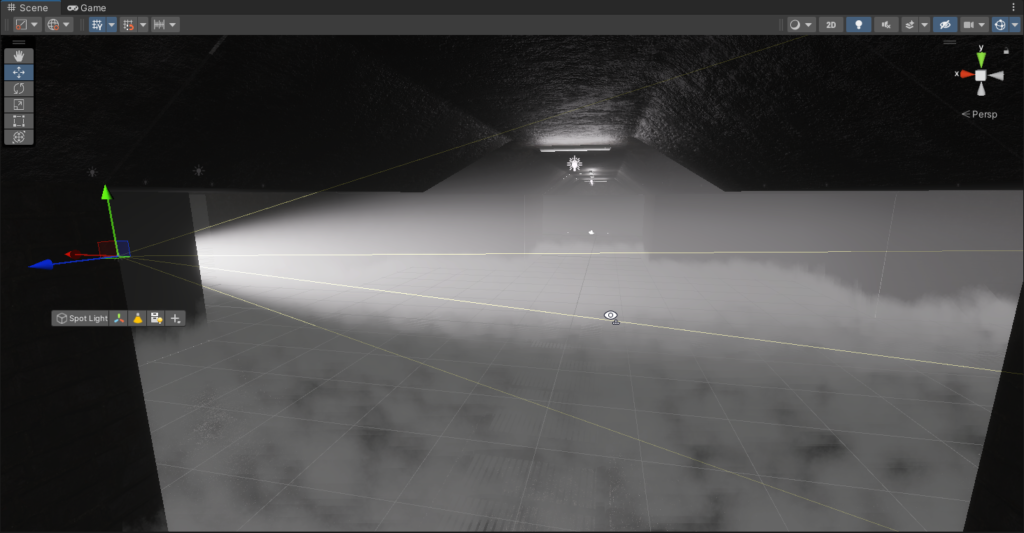
The ability to control the direct lighting on your volumetric surfaces (such as fog) is one of the defining features of the HDR pipeline. In this article we’ll show you how to take a simple spotlight and with some light layering, let you highlight your fog without cast a direct light it to enhance your scene and save on performance. Let’s Start by adding a spotlight to your scene, move it around and increase the intensitity to make it obvious where it’s casting.
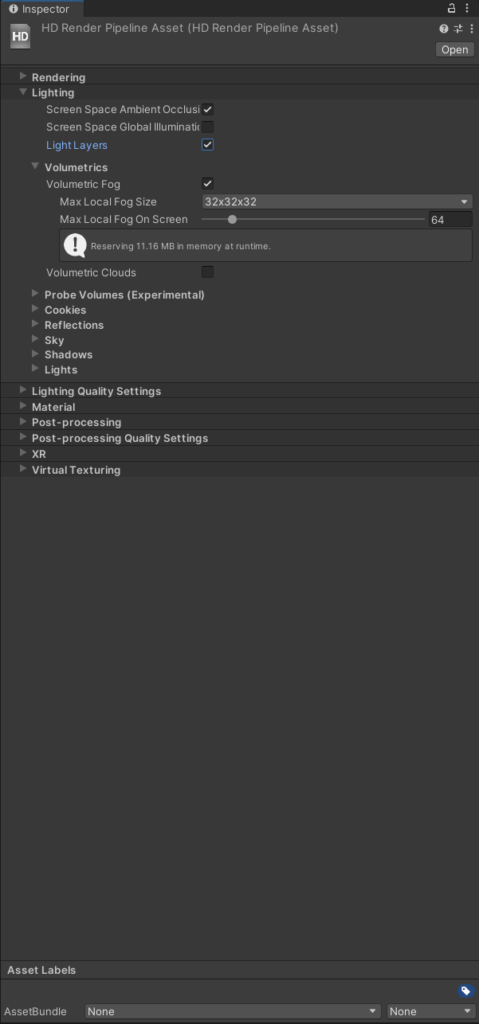
Head over to the HDRP Default Settings and hit the Light Layers checkbox his will enable the light layers on the spotlight we just made.
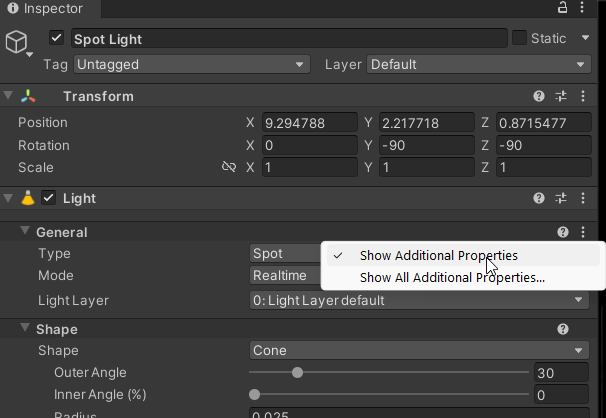
Next we’ll open up the Light Layer selection on the spotlight itself by clicking the little gear icon on the General section of the Light component. Hit Show Additional Properties this will reveal the light layers. Set the spotlight to another light layer like 1 or 2.
Now that the light isn’t casting into the scene, let’s use it create some ambience, like a nice blue tint. Go ahead and change the tint of the light under Emission>Filter on the LIght component.
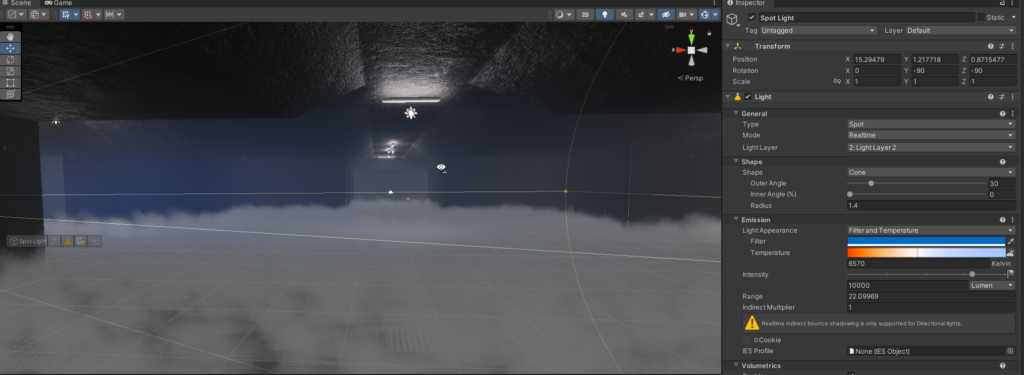
That’s much better. Now you have an ambient light illuminating your scene without generating a light source that needs to be calculated. You can use this (using light layers) to create points of interest, enhance set pieces, and create zones of “light” and darkness in your game while remaining performant. Until next time, happy coding.
