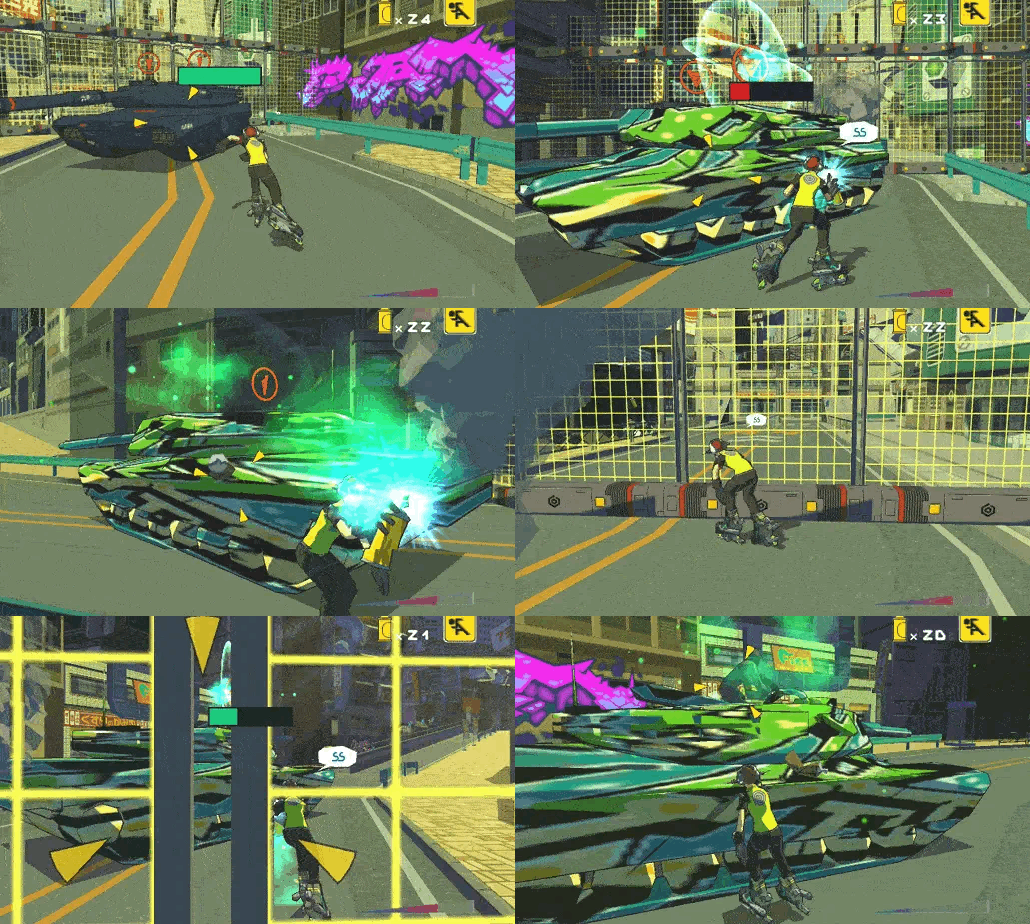
Decals also known as stickers are textures that you can project onto other objects in a scene that help add extra details this can be blood splashes, bullet holes, scorch marks, grafitti tags, basically anything you imagination (and art budget) can come up with. This can vastly improve the immersion of your games as they can be added dynamically (such as when a player shoots a wall and leaves a hole behind) to a scene.

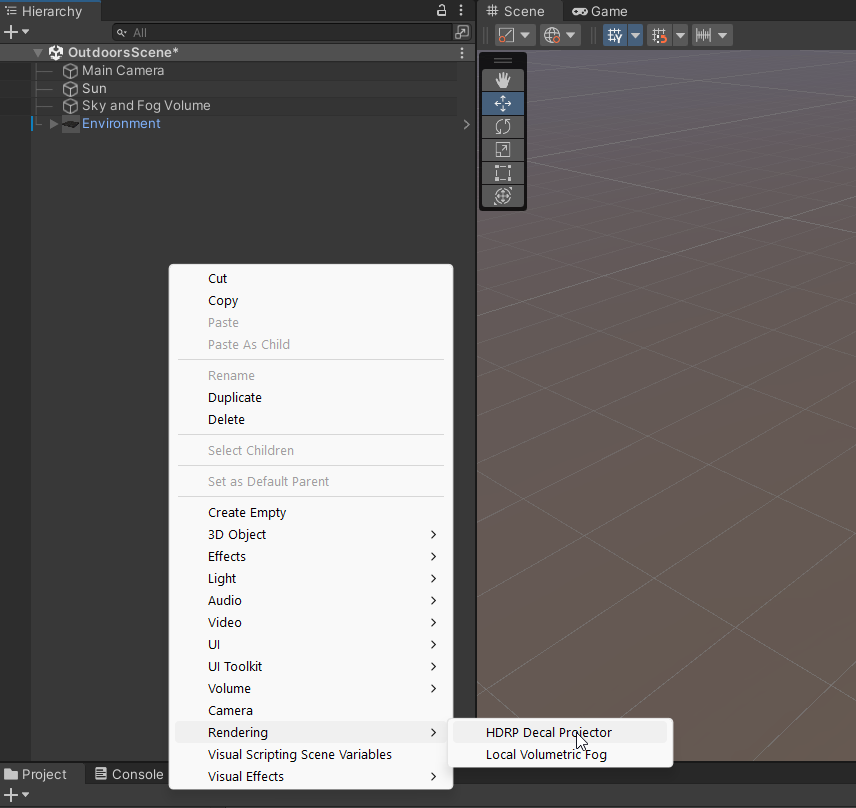
Start by importing the decal asset you wish to use into your scene. I went with this simple Bullet Hole decal from Open Game Art by Musdasch (here) that you can get for free. After you’ve imported it into your project start by adding a Decal Projector to your scene. You can add one by Right-Click>Rendering>Decal Projector in the Hierarchy (or hitting the plus button in the top left) this will allow you to project decals onto the scene like it aptly says.
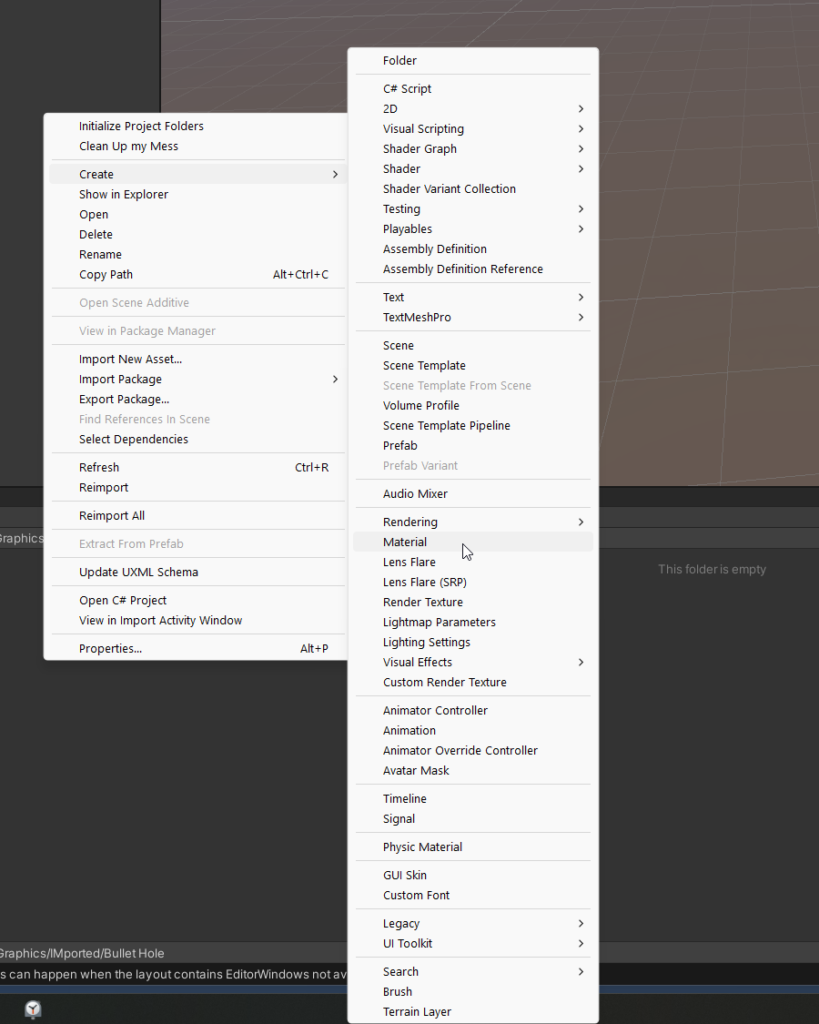
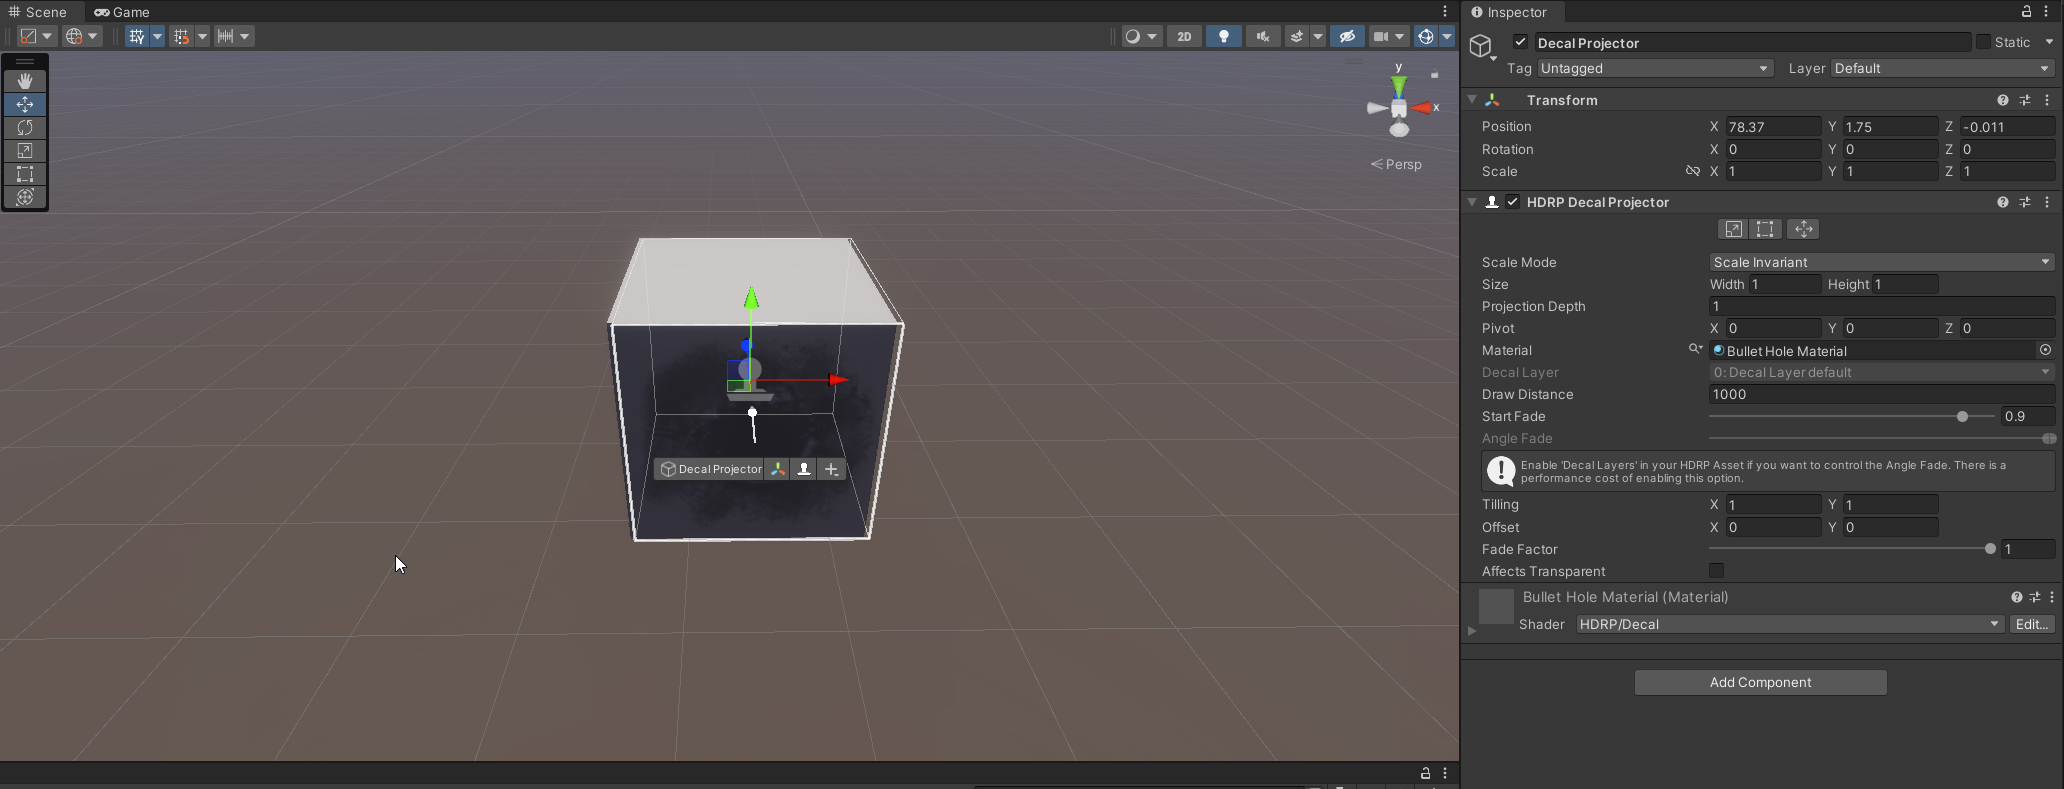
With your HDRP Decal Projector in the scene, you’ll want to create a new Material we’ll name Bullet Hole Material and set the shader to HDRP/Decal this will tell the projector that we have a decal material loaded in.
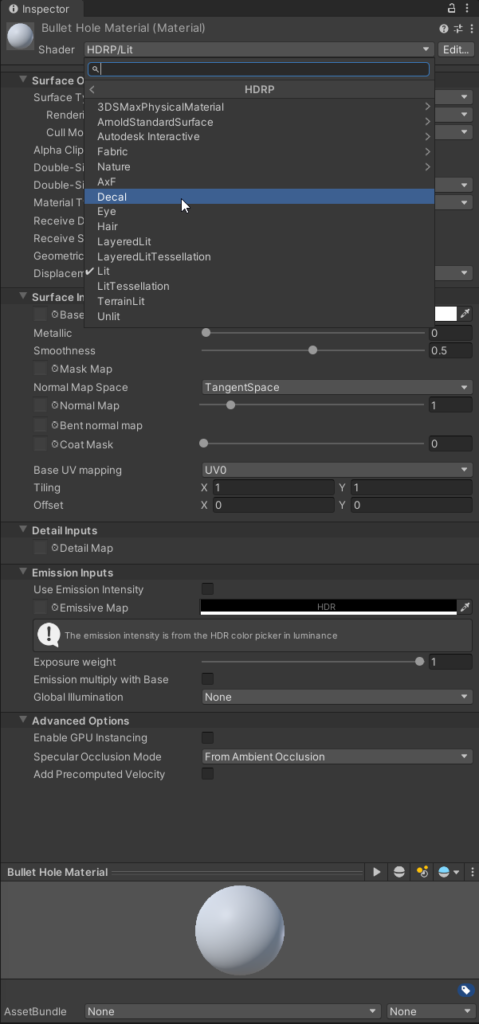
Be sure to add the texture to the newly created Material where it says Base Map

Add a cube to the scene and move the Decal Projector over it, if it is working correctly you should be able to see the texture overlayed the cube like below.
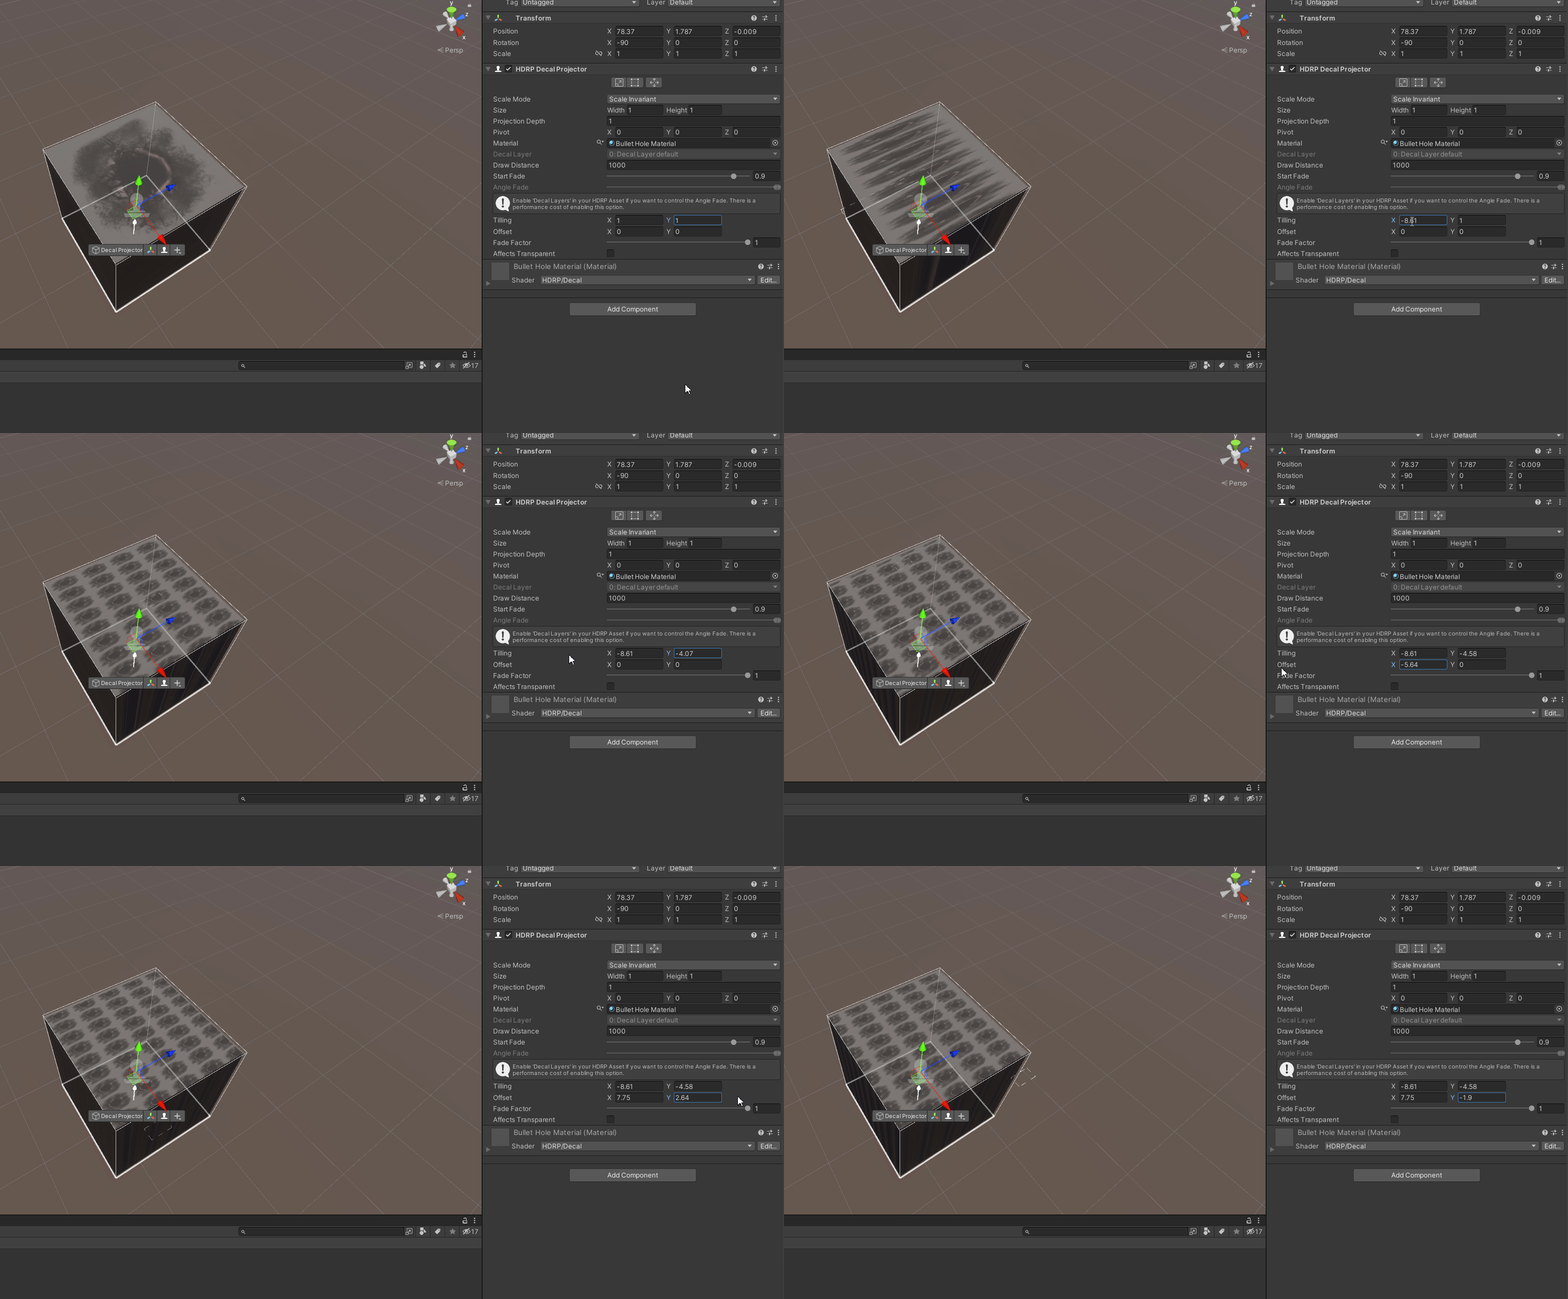
You can also adjust tilling and offset variables to access different parts of a decal sheet or to use a tiled pattern if your decal contains it.
With these tools you can effectively add decals to your games, get creative and experiment adding different decals across multiple objects, different textures, and experiment with tiling and offsets to give flare to your scenes. Until next time, happy coding.
